According to Keanu Reeves, Buddha was a perfumed, decadent prince who decided to try and find enlightenment by becoming a dirty, hungry acetic, until one day when he saw a barge floating by with a boy trying to learn how to play a Nepalese lute (or something). The teacher was all, “Don’t pull the strings too tight; they will snap. But don’t let the strings loosen too much either; they will not not play a clear note.” Keanu Reeves suddenly realised he the path to enlightenment could probably include some basic hygiene, and maybe even dinner now and then. Hurrah! The Middle Way was discovered!
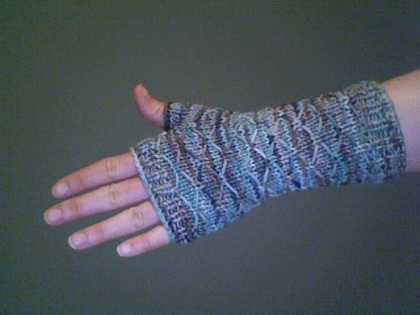
And that’s what this final Flying Gloves pattern represents. A middle way. These gloves are neither too short nor too long. They are neither too tight nor too loose. They might even bring Chuck Norris to his knees. This is how powerful they are. AND…they only take one skein of Koigu Kersti Merino Crepe. A pair of pretty awesome gloves for about $15. I feel ready to take on some koans right about now.
MAHAYANA FLYING GLOVES: A PATTERN TO LEAD YOU TO ENLIGHTENMENT
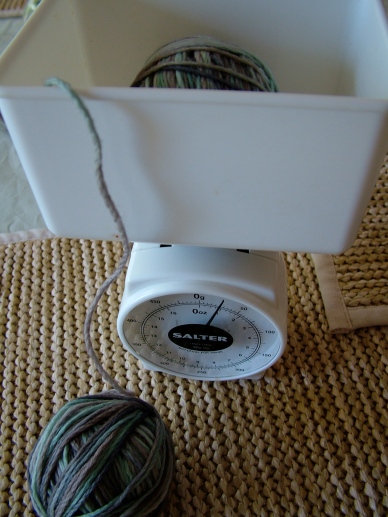
I got my new package of Koigu in the mail on Friday, and since then I’ve been working out this pattern to be knit from just one skein of Koigu Kersti. I got out the crappy diet scale again and wound and re-wound my skein until I got two balls of exactly 25g each:
Then, mercilessly, I bisected them and started working on a new prototype glove.
As before, the formula for figuring out how many stitches to cast on is 6x+1, where 6 is the number of stitches per diamond and x is the number of pattern repeats you need in order for the gloves to fit around your wrist. The 1 is that pesky “extra stitch” at the end of the pattern, and necessary for the pattern to work. In this version of the gloves, x=5. So you will eventually be working with 31 stitches per row.
But odd numbers are not so good for ribbing. If you have pretty skinny arms, go ahead and cast on 30 stitches for your ribbing. For the rest of us, I would recommend casting on 32 stitches instead, for greater ease. Remember, ribbing contracts naturally, so unless you really do have noodley appendages that would make the Flying Spaghetti Monster weep with pride, you’re probably better to cast on 32 stitches. Then join your stitches in the round with a k1p1 rib for 10 rounds.
After the 10 rounds of ribbing are complete, it’s time to start working with the beautiful Leyburn Sock Pattern. But before you can start working in pattern, you have to either k2tog (if you cast on 32 st) or make 1 (if you only cast on 30). Whatever you do, it will be your first stitch in the pattern. Complete 4 full repeats of the pattern for a wrist bit that’s 12 cm (4.5″) long, or fewer if you don’t want long fiddly gloves. Similarly, if you want the gloves to extend further past your palm over your fingers, you should probably cut out a pattern repeat here, or else you won’t have enough yarn. This is all that’s left over after completing a glove from a half-skein of Kersti:
So. Whatever path you have chosen, it has led you to the thumb gusset. The instructions here are similar to the ones in the original Flying Gloves pattern: for the right-hand glove, start at the beginning of the pattern. Make a stitch using the “make one increase” (m1) technique, and place a stitch marker after it, preferably in a different colour from the marker marking the start of the round (this is the “thumb marker”). Then, knit 12 st plain, and place a new marker of any colour (this is the “palm marker”). Now you’re at the natural start of the pattern. Knit the back of the hand in pattern. You will m1 in the stitch just before the thumb marker in every round that you “do” something (as opposed to the rounds knit plain), and the 12-st stretch between the thumb marker and the palm marker will always be knit plain from now on to avoid snagging things with the loose threads when you’re wearing the gloves.
It takes three repeats of the pattern to complete the thumb gusset. But an easier way to keep track is to count the stitches between the start marker and the thumb marker; when you hit 12, you’ve done enough. Knit the last plain round in the pattern, and then slip the thumb gusset stitches off the needles and onto some waste yarn. Now it’s time to join the back of the hand to the palm. Don’t worry if your join is a bit sloppy; you’ll take care of that when it’s time to knit the thumb.
Remembering to keep knitting the palm plain, complete one repeat of the pattern. If you knit four repeats for the wrist, you won’t have enough yarn to do more than one repeat…maybe another half-repeat, especially if you skimp on the ribbing, but I haven’t tried it yet so I can’t guarantee anything. Remember, you haven’t knit the thumb in yet, so you can’t really be sure how much yarn you have to play with at this point. Finishing with 5 rows of k1p1 rib (remember that you’ll have to either m1 or k2tog again to get an even number to rib with) and a nice loose bind-off brings the gloves up juuuust to the base of my fingers, and after comparing these gloves to the longer ones I made in the first version, I have to say I find the shorter ones to be less awkward. After all, fingerless gloves are not designed to keep your fingers warm; they are just meant to warm the blood at your wrist’s pulse point, and I have to say these gloves really do the trick. I feel myself getting warmer during the photoshoots, almost to the point of discomfort (hey, I made these babies just in time for summer, what can I say?) However, if you prefer more finger coverage, you will hopefully have planned for it and left a repeat off the wrist for just this purpose. Go ahead and complete another half repeat of the pattern, or a full one if you’re feeling cocky (or you dislike ribbing). Then finish off with as many rows of ribbing as you like (I’d recommend between 2 and 5).
Now for the tricky part…the thumb.
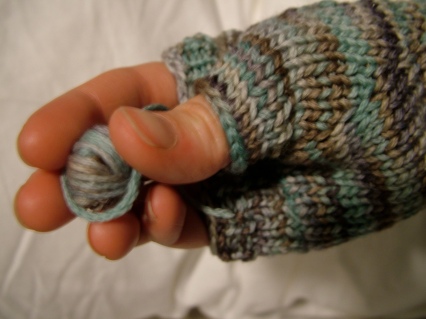
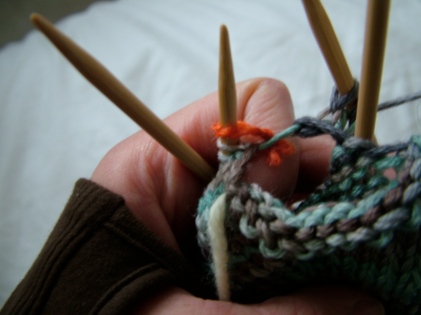
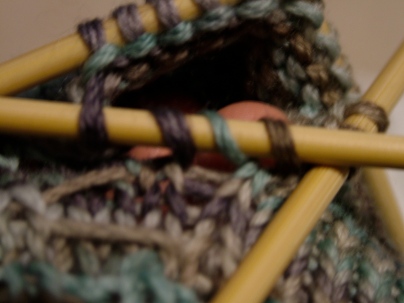
There are lots of ways to deal with a thumb gusset and make the stitches tight and pretty. I don’t really know them, so I prefer to make it up. After much trial and error, I have determined I quite like to pick up my stitches right from the body of work itself:
You can pick up as many stitches as you like. I recommend between two and four. Two is a bit stingy, unless you have really slender thumbs, although four is pushing it a bit towards excess, really. However, if you compromise with a really tight bind-off, four can be a reasonably comfortable number. I probably should have picked three this time, but I didn’t. I’ll let you know if the universe collapses in on itself (but so far, so good).
I start my round on the opposite side of the picked up stitches. To emphasize the tightness, I knit the pickups like m1 increases, which seems to work pretty well. Knit 4 plain rows, then bind off according to your preference. Because my methods are slapdash and improvised, there are usually still some holes and gapes and such between the thumb and the top of the palm. I just snip off a nice long tail and then weave it in in such a way that the imperfections sort of disappear as if by magic. Ta da!
Now, remember, to do the left hand, you’ll do the opposite; that is, you will knit 12 st plain, place the palm marker, m1 to start the thumb gusset, place the thumb marker, and then start knitting in pattern. As with the right hand, you will always m1 on the side closest to the palm.
Aaaaaaaaand…I think that’s it! These gloves should fit anyone with a lower arm circumference of approximately 18cm (7″) and a similar palm circumference. I consider myself to have relatively strong (read: thick) forearms and quite wide palms for the relatively small size of my hands. But as I said, this pattern leaves you with a little bit of wiggle room to customize it according to your needs, and when you consider that each glove only takes a couple of hours in front of the tv to whip up, it’s worth giving it a few gos to get it right for you.
As I said in my inaugural post, I am a newbie to both blogging and pattern-drafting, so if anyone actually gives this pattern a go and discovers a fault in it (or a hack for simplifying it), I’d love to hear it. And I’d love to see pictures of FOs, too! I know it’s totally the wrong season for gloves, but it’s actually quite a relaxing project, and besides, it’s never a bad thing to have some attractive (but cheap and cheerful!) one-size-fits-most emergency gifts lying around, y’know? I’m already hunting around for more Kersti…
Good luck!
April 15, 2008 at 2:54 pm
[…] previously regular nightly sessions. In fact, I even went so far as to make my second pair of the Mahayana Flying Gloves (also on Ravelry). I don’t think I posted my first pair either, so here they both are, for […]
June 14, 2008 at 12:24 am
[…] As soon as I have some spare time I’m planning on casting on for these (ravelry link) (here’s the original link). What’s your favorite DK weight pattern? Link to it here and I’ll pick someone at […]
December 1, 2008 at 6:57 pm
[…] took me a while to find a pattern that could stand up to all those colors without getting lost. The Flying Gloves pattern worked very nicely, and I am really pleased with how these came […]
October 22, 2009 at 2:13 am
[…] two is a fun pair by Knitting Mixed Tapes called Mahayana Flying Gloves. I have never knit this stitch variation before, so I’m […]
March 15, 2010 at 1:12 pm
great glove pattern and easy to understand instructions. I made my very first pair of gloves using your pattern and enjoyed it so much I’m now making a 2nd pair – using wool I accidently felted! Everyone comments on their patterning when I wear them and I’ve recommended your pattern to several friends. Thanks
August 1, 2010 at 7:53 am
[…] by Tara in knitting Tags: FO, gloves, handpainted, knit, knitting, mitts, sock Well here we are at the end of July, 2/3 of the way through winter already. I have been busily crafting away in between moments of work and study. I’ve finished off two more WIPs to share. I was lucky enough to get hold of some amazing hand painted organic merino from The Inner Stitch and quickly set about making myself a pair of Mahayana Flying Gloves. […]
December 19, 2010 at 10:41 am
[…] Well here we are at the end of July, 2/3 of the way through winter already. I have been busily crafting away in between moments of work and study. I’ve finished off two more WIPs to share. I was lucky enough to get hold of some amazing hand painted organic merino from The Inner Stitch and quickly set about making myself a pair of Mahayana Flying Gloves. […]
April 25, 2011 at 11:32 pm
[…] took me a while to find a pattern that could stand up to all those colors without getting lost. The Flying Gloves pattern worked very nicely, and I am really pleased with how these came […]
May 25, 2011 at 11:33 am
I love the way you write up the technique, thank you!
October 2, 2011 at 8:13 am
[…] So I started to make some mits in the stylee of these. […]
December 5, 2014 at 12:08 am
I don’t suppose you have this written from start to finish somewhere? 🙂
December 5, 2014 at 12:11 am
No, sorry, I totally just used the “leg” part of the Leyburn Sock pattern (which was free seven years ago when I wrote this post, not sure of its status now), I didn’t think it needed to be written twice 🙂
December 5, 2014 at 12:22 am
Ok, thanks.